


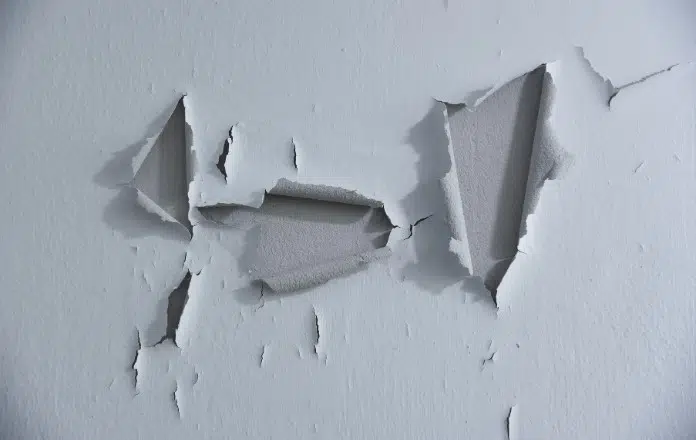
Flaking or peeling paint is more than a cosmetic issue. It signals that something in the coating system, substrate, or environment isn’t compatible. Repainting without understanding why it failed usually leads to the same result within months. This article shows homeowners how to read the clues, identify the underlying cause, and address it in the right order. You will learn simple tests you can perform, common failure patterns on wood, drywall, and masonry, and how preparation, primer selection, and timing interact so your next coat bonds properly and lasts.
-
What Peeling Paint Is Telling You
Peeling patterns can clue you into the underlying cause. Curling edges with bare wood exposed may point to sun-damaged trim that lost adhesion after ultraviolet exposure weakened the coating. Thin, scale-like alligator cracking over glossy doors often indicates brittleness or poor adhesion between an older enamel and newer paint. Blisters that break open and reveal clean primer may suggest trapped moisture beneath the coating. A powdery residue on your hand after rubbing a wall indicates chalking, which can interfere with new paint adhesion. If you are unsure, a qualified contractor such as Highfill Painting can help determine whether moisture, contamination, or incompatible coating layers are contributing to the failure before repainting begins.
-
Common Root Causes: Moisture, Contamination, and Movement
Moisture is one of the most common causes of peeling paint. On bathroom ceilings, warm steam can move through joint compound and latex coatings, creating small blisters that later peel. On exterior soffits and fascia, roof leaks, damaged gutters, or other moisture sources can wet wood from behind and push coatings away from the surface. Masonry walls with efflorescence may show white mineral deposits and lifting paint because moisture moving through the block carries salts to the surface. Even painting too late in the day can allow condensation or dew to interfere with adhesion.
Contamination is another frequent cause. Chalking from weathered paint, manufacturing residue on new trim, cooking grease on kitchen walls, and hand oils around switches can all interfere with adhesion. Cleaning with an appropriate degreaser or surface cleaner, followed by proper rinsing when required, can improve preparation. Movement matters as well. Failed caulk joints can open and close with seasonal changes, splitting paint along seams. Wood siding naturally expands and contracts, while hard or brittle coatings may crack over knots and end grain. Incompatible coating layers can also cause problems. Glossy older enamels often need cleaning, surface dulling, and a compatible bonding primer before receiving a new finish coat.
-
How to Diagnose Before You Scrape: Simple Home Tests
Start by inspecting where the failure occurs and which layer is releasing. A simple tape adhesion check on a small, inconspicuous area may help reveal whether only the topcoat is failing or whether multiple layers are separating from the substrate. Avoid aggressive testing on delicate or historic surfaces.
Rub the surface with a clean dark cloth. Heavy powder transfer may indicate chalking and the need for more thorough washing before repainting. Water behavior can also provide clues. If droplets bead strongly on a supposedly clean surface, gloss, grease, wax, or another contaminant may still be present.
For suspected moisture problems, a moisture meter can help compare affected areas with nearby dry material. Exterior wood should be dry enough to meet the manufacturer’s requirements before applying paint; the coating can also affect preparation. Older glossy finishes may require stronger surface dulling and a bonding primer before recoating. Rather than relying on one household solvent test alone, consider the age of the surface, coating history, sheen, and manufacturer guidance when planning preparation.
On exterior surfaces, temperature and humidity matter. Follow the paint manufacturer’s limits for surface temperature, air temperature, humidity, and expected drying conditions so the coating has enough time to form properly.
-
Fixing It in the Right Order: Prep, Prime, and Paint
Correct preparation is more valuable than adding extra finish coats. If older coatings may contain lead, follow applicable lead-safe practices and avoid uncontrolled sanding or dust generation.
Remove loose and failing paint back to firmly bonded material. Feather rough edges so the transition is smooth. Generally remove failed silicone from areas that need to be painted because standard paint does not adhere well to pure silicone.
Match the primer to the problem. Previously glossy surfaces may need a high-adhesion bonding primer. Tannin, smoke, water, or other persistent stains may require a compatible stain-blocking primer. Bare exterior wood should receive a primer appropriate for the species and coating system, while masonry often benefits from products designed to tolerate vapor movement.
Use paintable sealants where joints are intended to be sealed. Apply primers and finish coats according to label instructions, including spreading rate, drying time, recoating window, and environmental limits. Avoid applying overly thick coats because they can dry unevenly and reduce long-term performance.
-
Preventing a Repeat: Ventilation, Caulk, and Timing
Address the moisture source before repainting. In bathrooms, a properly sized exhaust fan vented outdoors can help reduce humidity, and effective ventilation removes cooking moisture rather than simply recirculating it.
Outside, keep gutters and flashing in good condition so water does not repeatedly soak trim or siding. Redirect sprinklers away from painted walls and keep soil, mulch, and vegetation from remaining in constant contact with vulnerable siding edges.
Build inspection into routine maintenance. Gently wash dirty or chalky exterior surfaces when needed rather than using excessive pressure that may force water behind siding. Check caulked seams and trim faces periodically for cracks or areas that can admit moisture.
Choose sheen based on both appearance and use. Satin or semigloss finishes may offer more washability on trim, while lower sheen wall paints can disguise minor surface irregularities. Exterior coatings should remain within the manufacturer’s recommended range for the required drying and curing period.
-
Two Common Examples
A bathroom ceiling with widespread small blisters may trace back to persistent humidity, inadequate ventilation, or poor surface preparation. Start by removing the loose coating, cleaning the surface, letting it dry thoroughly, then applying a bathroom-suitable finish. This can be caused by curling edges, cracks, ultraviolet-damaged joints, or accumulated coating layers that have become brittle. Removing unstable paint can cause curling edges, cracks, and wood damage; repairing damaged joints, preparing properly, and using weather-resistant paint can stop the cycle.
The key is to stop the cycle rather than simply covering visible damage.
Diagnose First, Then Repaint
When paint fails, the fastest path to a durable finish is not simply applying another coat. It is identifying why the coating released, correcting moisture or contamination problems, and choosing a preparation and primer system suited to the substrate.
By reading the failure pattern, checking for moisture, evaluating the existing coating, and repairing in the right sequence, homeowners can avoid repeating the same peeling problem.
If the failure is widespread, involves multiple old coating layers, or affects surfaces that may contain lead, professional assessment may be the safer and more efficient option. A careful approach to diagnosis and preparation can produce a finish that looks better, cleans more easily, and lasts much longer.
